Pick the material before you pick the spot on the wall. Steam, condensation and the odd splash all work on whatever hangs in a bathroom, so floating shelves in bathroom settings face constant wear. The classic mistake is grabbing the cheapest board-style shelf and expecting it to look decent a year later.
Most mass-produced floating shelves are MDF, and one maker notes that MDF has a short lifespan in steamy bathrooms. Once moisture gets past the coating, the core swells, especially at cut edges and screw holes. Sealed or laminated engineered wood holds up better, but "sealed" has to mean every edge, not just the top face. Already own an MDF shelf? A powder room with a fan and no shower is a far kinder home for it than a bathroom with a tub.
Here are the better options, roughly ranked by how much humidity they tolerate:
The hardware matters as much as the shelf. Standard steel screws and brackets rust in bathroom humidity, so go for stainless or coated fasteners. Rust streaks running down the tile or paint usually mean someone installed the shelf with the wrong screws.
To keep wood shelves mold-free, run the exhaust fan during and after showers, wipe the surface when it gets damp, and don’t leave wet towels or soggy baskets sitting on it. If you’re worried about the finish, a water-resistant polyurethane is the usual answer; reapply it when the surface starts to look dull.
Height is where the advice on floating shelves in bathroom placement gets contradictory. Lowe’s recommends at least 24 inches between the tank lid and the bottom of a shelf or cabinet, so you can lift the lid without cracking your head. Other guides, such as this one from Engineer Fix, say 10 to 12 inches above the tank lid is enough. Both can be right, depending on the home.
Here’s one way to square them. Treat about 12 inches as the bare minimum for a shelf holding only small, light items, and aim for 20 to 24 inches if you want comfortable head room and easy tank access. Lifting the lid to fix a flapper or fill valve takes real working space, so go higher if you can. Check your own setup too, since tank height and flush-lever position vary, and keep the lever side clear of anything that could block it.
Is it safe to put shelves above the toilet at all? Yes, as long as they’re anchored properly and hold only light, non-breakable items. Skip glass jars and heavy bottles directly over the bowl, and keep the lowest shelf out of the zone where a standing person could hit it.
Depth and width are simpler. A depth of 9 to 12 inches fits toilet paper rolls and small baskets without crowding your face; anything near 18 inches juts out too far. For width, a shelf about as wide as the toilet, roughly 16 to 20 inches, looks tidy, while a longer one of two to three feet gives more storage and suits a wider wall.
Clearance rules also shape where a shelf can go beside the bowl. The IRC 2024 requires at least 15 inches from the toilet centerline to any side wall, partition or obstruction, and 21 inches of clear space in front. The Uniform Plumbing Code asks for 24 inches in front instead. As far as the sources show, these rules cover floor-level clearance and don’t set a vertical height above the tank. Even so, a deep shelf mounted low on a side wall can push into that 15-inch zone, so keep side-wall shelves shallow or hang them high above the fixture.
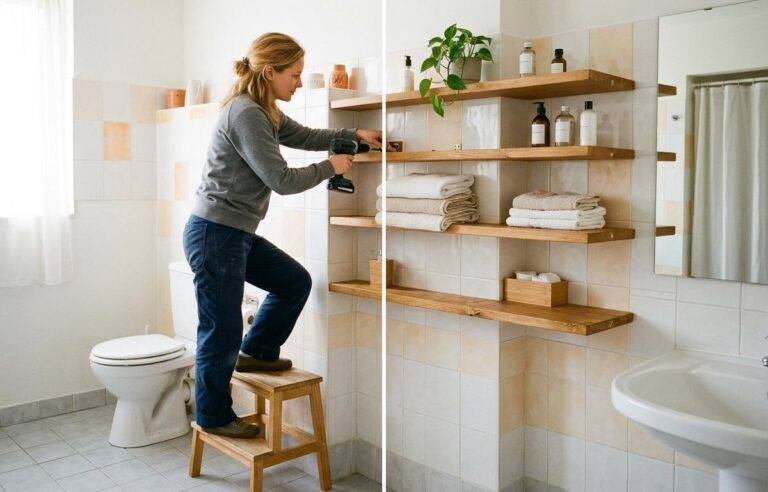
Installing floating shelves in bathroom walls only looks effortless. Their strength comes from where the fasteners land, so put your effort into the layout.
Treat capacity numbers with caution. One vendor claims a shelf over the toilet holds about 15 to 25 pounds when mounted to studs and about 10 to 15 pounds with quality anchors in drywall. Those are vendor figures, not independent tests, so stay well under them. Width matters too: a longer shelf only spreads the load across more fasteners if those fasteners actually hit studs or solid anchors.
If your studs don’t line up with the position you want, shift the shelf slightly or use a continuous mounting rail that spans two studs. That beats forcing a weak install.
Plenty of people can’t drill into tile or a landlord’s wall, and floating shelves in bathroom installs are where that limit bites hardest. True floating shelves depend on fixed brackets, so "no-drill" usually means a different style of storage rather than some miracle adhesive shelf.
The most reliable no-drill approaches are:
If you want the floating look while renting, ask whether a few small, neat screw holes are acceptable and can be patched at move-out. A couple of well-placed stud anchors often do less damage than several failed adhesive attempts.
For more ideas that skip the drill, see our guide on how to organize a small bathroom on a budget and the broader home organization ideas for small spaces.
When you’re ready to shop, work backward from your constraints: wall type, height available above the tank, and what you plan to store. A stud-mounted wooden or metal shelf suits a solid wall and a decorative look. A slim stainless or glass shelf suits a humid shower zone. A freestanding rack suits a renter or a wall you can’t drill.
Run through this checklist before you buy:
You can browse the full range in our bathroom shelves category, compare options in bathroom over toilet shelves, or read our home storage organization products guide for a broader view. With free worldwide shipping, easy returns and a 30-day money-back guarantee, trying a shelf in your own space and checking the fit carries little risk.
Choose a durable material, mount to studs wherever you can, and respect the clearance around the toilet, and your floating shelves in bathroom will earn their spot on the wall.


Leave a comment