Nearly every small bathroom has the same wasted spot: the wall above the toilet, which is where bathroom over toilet shelves earn their keep. There are three ways to use it, and they differ a lot. The right pick depends on your wall, your lease and how much you need to store.
Freestanding racks (étagères) stand on the floor and straddle the tank, with open shelves stacked above. Renters love these bathroom over toilet shelves, and so does anyone who’d rather not drill, since nothing touches the wall. They’re flexible, and marketplace prices run low, roughly $19–$37 in one snapshot. The catch is stability. A tall rack loaded at the top can tip, and we found no independent tip-over data, so anchor it to the wall if your landlord allows it and keep heavy items on the lower shelves.
Over-toilet cabinets add doors, so clutter stays out of sight. They typically run 7–12 inches deep, enough for towels, spare rolls and toiletries. They suit shared bathrooms and guest baths where a tidy look matters. Pricing varies widely; IKEA’s FRÖSJÖN shelf unit, for example, is listed at $59.99. The downside is bulk. A deep cabinet can feel heavy in a narrow room, and many designs look alike.
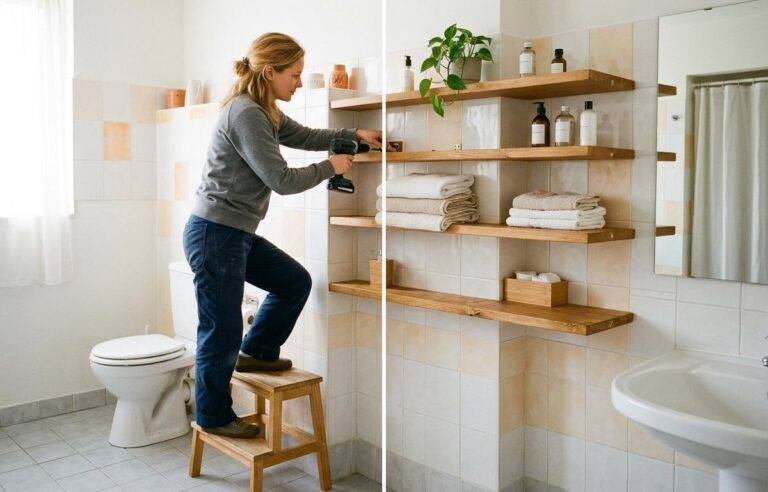
Wall-mounted floating shelves are the lightest-looking choice, and a good fit if you want a styled, spa-like wall with a few baskets, plants or rolled towels. You pick the width, spacing and material. They do need proper mounting, and they hold less than a cabinet.
A quick rule of thumb: go with a freestanding rack if you rent, a cabinet if you want concealed storage, and floating shelves if the wall is solid and you care about the look. For more ideas on stretching tight rooms, see our home organization ideas for small spaces, or browse our bathroom shelves collection.
Search for "how high above the toilet" and the advice contradicts itself. Lowe’s how-to guidance says to leave at least 24 inches between the tank lid and the bottom of a cabinet or shelf, so you can lift the lid and avoid head bumps. Another guide gives a minimum of 10–12 inches above the tank lid. Others land in between, at 12–18 inches above the tank.
None of these sources explains the gap, so here’s a practical way to read it. Treat 10–12 inches as the absolute floor, workable only if nobody needs to reach into the tank and nobody tall uses the room. The comfortable range is 20–24 inches. You can remove the lid, replace a flapper or fill valve, and stand up from the seat without hitting anything. If you’re unsure, go higher, as long as the things you use daily stay within easy reach.
Reach height matters too. A shelf mounted for maximum clearance may put the top shelf out of reach for a shorter person, a child or someone using a mobility aid. Keep frequently used items in the middle band and save the top for rarely needed spares.
Depth follows similar logic. Over-toilet cabinets commonly measure 7–12 inches deep. One shelf guide suggests 9–12 inches suits toilet paper rolls and small baskets, and that anything beyond about 18 inches sticks out too far. For width, a shelf roughly as wide as the toilet, around 16–20 inches, is a common choice, while some sources suggest 2–3 feet if you want a fuller display. Before buying, measure the tank width and note which side the flush lever sits on. A shelf or rack that blocks the lever or the lid swing is useless. Our research turned up no guidance on this fit check, so a tape measure is your best tool.
Building code and design-blog folklore are two different things, so let’s separate them. The IRC 2024 section P2705 requires at least 15 inches from the toilet’s centerline to any side wall, partition or obstruction, and at least 21 inches of clear space in front of the bowl. The Uniform Plumbing Code, used in some regions, requires 24 inches in front instead of 21.
Notice what’s missing: neither figure sets a vertical clearance above the tank. One small-space design source states plainly that the code covers side and front distances but not the height of a shelf over the toilet. We couldn’t check the primary ICC text directly, so treat that point as secondhand and confirm with your local building department if you’re renovating.
So the "24 inches" figure is a design convention for bathroom over toilet shelves, not a code requirement. The side clearance rule still matters for shelf placement, though. A deep shelf or cabinet mounted beside the toilet can intrude into the 15-inch side zone, and one guide lists that as a common layout mistake. If your toilet sits close to a wall, a shallow shelf or a unit that stays directly above the tank is the safer pick.
Codes also vary by jurisdiction and change with updates, and we didn’t find official ADA text on accessible reach ranges. If accessibility is a priority, for example in a home for a senior or caregiver, use the figures here as starting points and check current local requirements.
Is it safe to put shelves above the toilet? Yes, if they’re mounted correctly and loaded sensibly. The main risk is overloading a shelf hung only on drywall.
One vendor guide estimates a shelf over the toilet holds about 15–25 lb when mounted into studs and about 10–15 lb with quality anchors in drywall. Those are vendor claims, not independent tests, so treat them as rough ceilings and stay well under them. A few rolls of toilet paper and a plant are fine; stacked glass jars are not.
The same source offers some sound mounting advice: place brackets 6–8 inches from each end of the shelf, and add a center bracket for shelves longer than 36 inches. Locate studs with a stud finder and drive screws into them whenever the layout allows. Where studs don’t line up, use anchors rated above your expected load, and pick stainless or coated hardware, since plain steel screws and brackets can rust in bathroom humidity.
Renters have options that skip drilling altogether:
If you’re shopping, our home storage organization products guide and our bathroom shelves height, depth and safe install guide cover mounting basics in more detail. We also stock a bathroom storage rack over the toilet shelf that needs no drilling into a tiled wall.
Bathrooms are humid, and the wall above the toilet gets steam from showers and the occasional splash. Your choice of material decides how long the storage looks good.
Several shop guides warn that bathroom over toilet shelves made of MDF and unfinished pine do badly in steamy rooms. One vendor puts MDF’s life at 6–18 months and unfinished pine at 1–2 years, and rates teak far higher. Those lifespan figures come from a seller and are unverified, so read them as direction rather than fact. Another maker notes that most mass-produced floating shelves are MDF. A counterpoint worth knowing: some sources say engineered wood can work if it’s properly sealed. In short, sealed, moisture-rated wood can survive, while bare MDF is a gamble.
Metal and glass are safer bets. Stainless steel and brass are cited as durable in damp areas, and tempered glass is a strong contender that also lets light through, which helps a small room feel more open. If you choose wood, look for a sealed finish, wipe it dry after steamy showers, and make sure your bathroom has ventilation. Airflow and regular wiping are also your best defense against mold on wood shelves.
Here’s how to choose, in order:
Budgets run from low-cost marketplace racks to mid-range cabinets, and retail prices for bathroom shelves can stretch widely, so decide what matters most before comparing. If you want to keep exploring, our guide to choosing shower shelves covers wet-zone options, and the space-saving furnitures collection has more ways to free up floor. Once you’ve settled on your bathroom over toilet shelves setup, you’ll have storage that fits the room instead of fighting it.


Leave a comment